Labels

Friday, April 12, 2013

Still Going Coastal: Part II Summer Decor

by Heather

I'm continuing the Coastal Summer Decor that started last Thursday (see post 4/4/13), so let's start in the family room:

The fireplace mantel is always a challenge. It's a narrow spot that makes it difficult to decorate but it's highly visible from most of the other rooms so it needs to be "done." For summer, I've changed things up by adding a newly purchased mirror from Target which my husband so nicely stained a darker color (see original below). I added a hanging starfish to the center circle of the mirror, and a couple of starfish at the base. In front of and along side of the mirror are shells and driftwood pieces from Whidbey Island (friend Candace has a summer home there and it's become one of my favorite places to visit). The two tall coral candle holders were spray painted black by me several years ago (spray painting is my only crafty talent). 
The cool thing about the picture above is that you can see my kitchen chandelier in the mirror's reflection. It's the black and chrome one that I found at Z Gallerie several years back and they're still selling it. Not a typical kitchen chandelier but I love it in my black and white kitchen.
The small candle holders are from Michael's last year and have shells, sand, and rope surrounding the exteriors of the two different styles.
I'd like to say that I made the hanging garland of starfish but the truth is I found it at Michael's a few months ago. I'm sure it would be easy to make, but it was a lot easier to buy it already done :)
The glass sconces on either side of the fireplace are an old purchase from Pottery Barn with last year's Pottery Barn shell candles aglow.
The "rope" candles on the mantel are from Cost Plus last year.
"Before" picture of mirror below
Across the room from the fireplace is a narrow glass-topped table that functions as a buffet or drinks table when entertaining.
I found the two lamps at Target recently on clearance! Had been thinking about getting lamps for this table, and lo and behold, there they were and had the summery coastal rope already wrapped around the bases. These are the third lamp shades I've had on them; still not sure they're the right ones.
Any suggestions?
 The tray with the silver edging and rope handles is from Pottery Barn this spring. I have a smaller one in the dining room at the front of the house. Love 'em! The large glass hurricane with silver and rope is also from Pottery Barn and is the largest of three.
(See pictures of the small and middle-sized ones on the earlier post on Summer Decor)
The vintage picture on the wall was a find when friends Kent and Gloria bought a summer home in Pine, AZ. It was hanging in the house and they gave it to me (I love the kind of housewarming where the guests get the presents!). Note that I've switched out the coral silverware in the glass jar for four shell spreaders. I continually keep moving things around as the mood hits me.
Ann provided the net-encased vase on the right at our last swap party. Love it!
 The dining room table gets a coastal theme with found objects. Husband Tom made the driftwood candle holder from a branch that we discovered while kayaking with friends Kent and Gloria (yup, the same two who gave me the picture) up on the Mogollon Rim. It was a struggle to balance it on the kayak while paddling, but pretty hilarious to watch. Tom drilled the round holes just the right size for tea lites. The stack of starfish on the left came packaged this way from Target and I liked it too much to separate them.
The three glass candle holders are from Nordstrom's several years ago. The largest one is filled with bits of driftwood found on Whidbey Island as well as some "fakes" from West Elm. Pillows in the background are from Target this year.
The wooden caddy is from Decor Steals; the rattan-encased glasses and pitcher are from Williams Sonoma last year, and more of the coral-handled silverware is housed in one of the glasses.

Birdcages and rustic hurricanes grace the top of the entertainment center flanked by black vases filled with lighted pussywillow branches. I found the white coral bookends at Target last year.
The gnarled grape vine is from West Elm last year. I've seen them this year at HomeGoods, too.
A round table partially covered with fishing net next to the family room sofa gets refreshed with flowers in individual bottles wrapped with a little twine and shell. A candle burns in a bowl of shells and a small grape vine adds to the natural look.
Another new item from Pottery Barn (I wasn't kidding when I said I needed to get a job there to support my habit): the bar cart. Love the mix of wicker and steel. Could only be purchased online so I took a chance and was pleasantly surprised. It's small enough for my needs and will do well on the patio outdoors for the occasional evening entertainment. So glad it wasn't outside last Monday when we had a dust storm followed by a thunderstorm --
everything on the patio looks like it was dipped in mud.

The white and gold shell dishes are from West Elm last year; the shell bottle toppers are from Maui and the glass ball is new from Pottery Barn.
The bedrooms and bathrooms are decorated for the summer season, too, but I've made you look at enough home photos for today.
Must be time for a glass of wine. I'm raising my glass to you and wishing you a wonderful weekend filled with sunshine and happy thoughts!

Love,
Heather


Thursday, April 11, 2013

Spring Home Tour

by Sheila

Beautiful Dining Room - Note the blue ceiling and curtains. 
 
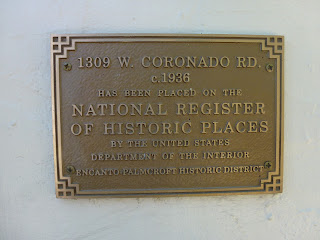
The homes are amazing, the gardens are groomed, and the owners are on hand to share their stories.  They are large and small, casual and ornate, and basically there is something for everyone.  I'm talking about the Encanto Palmcroft Home Tour that was held recently in Phoenix, but I know these tours are available around the country.  If you've never been to one, I highly encourage you to give it a try. It's a fun way to spend an afternoon, strolling through homes where owners have been generous enough to put their inner realm on display for all the world to see.  There is a charge ($20 in this case) - a little hefty, but  this all goes to charity, so it's all good.

These homes were originally built from the 1920's to the 1940's.  Much of the original character has been maintained, but as you will see, numerous upgrades have been made over the years.  There are lots of great ideas and interesting approaches to using space.  Many of the finishes are to die for, and has I told my husband some of the appliances are worth more than my car.  The only problem with these amazing tours is that you want to go home and get out a sledge hammer  and do a little renovating yourself.
 
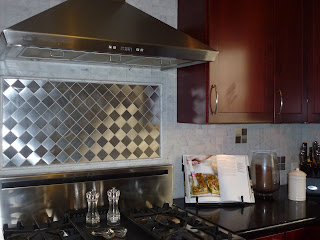
The Kitchens...


Living Areas...


Bedrooms & Bathrooms...  


And special spaces indoors & out...


Thanks to all the homeowners who participated in this and other tours around the country.  We appreciate your willingness to open your homes to us and share the special place you call home! 


Wednesday, April 10, 2013

Pack for Travel: Your Carry-On Bag (and More!)

by Sheila
Ready for a little Adventure?

Are you overwhelmed at the thought of organizing your stuff for a vacation get-away? Does packing your bags make you tired before you've even left home? I rarely check bags, so I like a carry-on tote to be large enough to accomodate my purse, so that I can slide it in and adhere to the "two carry-ons per person" rule.To simplify the process, here is my list of items to include in a carry on tote bag:
This is everything I include in my carry on tote bag

The chargers, meds, iPod, pen, notebook & critical meds in pill box
Reading material/entertainment & sunglasses & readers
 
 
I like a re-fillable water bottle and a few healthy snacks just in case
 
 
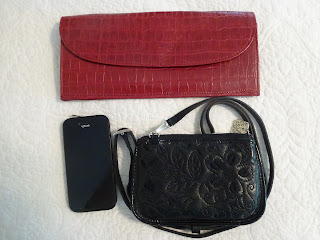
Phone, wallet-on-a-string, passport and travel docs in red folder
Toiletries (TSA approved) and small make-up bag

Purse (be sure to bag all liquids, i.e. lipstick, lotion, etc. in a small clear baggie) or,
ID/wallet (I bring a small wallet with a strap that can be a small purse)
Phone
Passport (if needed)
Frequent flyer card or number (if needed)
iPad/Pod?Music, headphones, jack for I-pod in car (for music or a book)
Camera
Sunglasses and/or reading glasses
Book/E-reader/Audible book (This is all on my iPad for simplicity)
Record locator for all reservations done on-line
Drink or upgrade coupons
Hotel info
Rental car info
Note: I like Trip-It, the free travel organizer app to keep all the above listed travel info in one place - check it out)
Notebook and pen (I am always wanting to make a note of something!)
Critical medication
Toiletries (if not checking bags - see previous post on Pack for Travel:  Toiletries & TSA)
A sweater and/or pashmina style wrap (airplanes can be cool)
A snack (fruit, nuts, etc., you can't count on your airline feeding you)
A plastic bottle for water (refill as you go) - don't bring it full through security - Busted!

You should have all the basics you'll need for your flight and arrival at your destination at your fingertips!

 
All packed neatly in the tote
Save your shoulder and use your wheeled suitcase to haul your carry on

Now for the clothing... My travel mantra goes like this:

Less is more. Rarely wear dressy clothes on vacation.  Fewer shoes are better.  Mix, match and layer.  Comfort and versatility are key.

I write all of my packing lists down and then, on my way home, I edit this list, eliminating things I didn't wear and adding items I wish I had brought. Over the years, I have created some great lists for a variety of trips, long and short, and different climates and activities.  See the following posts for more travel-related info:

Pack for Travel:  Toiletries & TSA, Travel Tips for the Holidays, Pack for Travel; Make Your Plan

Check back for more upcoming info on packing, including Weekend Getaways and A Two Week Sightseeing Tour
Have a great time!

Tuesday, April 9, 2013

On a Cinnamon Roll roll...

by Ann

Often when I prepare a recipe I end up making it again right away since it it fresh in my mind (and I've had success) .  A few weeks ago I made five batches of lemon bars within a short time span, and now I have made my "Overnight Cinnamon Rolls" twice within the last week; once for Easter brunch, and then a few days later for a staff-meeting-turned-birthday-party potluck at work.

This is one of the few recipes that I will take credit for creating.  With that said, somewhere down the line years ago I had to start with someone else's version of a cinnamon roll recipe, but I have, and continue to transform it into what I am sharing today.  

When I taught Foods classes in a traditional high school we had 55 minutes to set up, prepare, eat and clean up, which is challenging to say the least.  To make this work, many of the recipes were divided into two days, but that took planning and recipe adjustment. 

The advanced level of my class ran a "Bakeshop" a couple days a week for a few weeks each semester at which the good-sport teachers could sign up to bring their classes down to our area to buy the food that the culinary students prepared.  Next to breakfast burritos, these cinnamon rolls were the biggest hit.

I had to smile when I hunted down this recipe because I had written it very specifically for the lab environment -- it said that the counter needed to be thoroughly clean before kneading the dough, designated the specific bowls to use, and how to wrap and label their rolls so the kitchen groups would get the same pans back the following day.  I reworded it, assuming that your counters are clean and that you only have one kitchen.  ;-)
Start out by proofing the yeast with warm water, oil and sugar for 15 minutes.  
While the yeast is proofing prepare the sugar-cinnamon filling.
A food processor makes this easy, but is not required.
Pulse all ingredients until the butter is cut into pea-sized pieces.
The dough does not need to be kneaded too much -- it should be very soft, but not sticky.
Roll the dough out to about 16 x 18" on a clean counter.
Spread the filling over the dough, leaving about one inch to pinch at the end.
I like a lot of filling.  You may not want to use all of it, but I use it as stated in recipe!
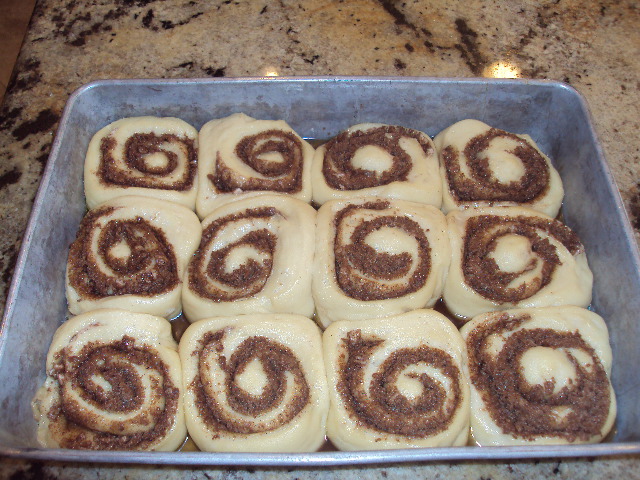
Cut into 1 1/2" slices.  They will grow to fit the pan.  Place 12 in a 9 x 12" sprayed pan.
Note that I use unflavored dental floss to cut the cleanly without squishing the dough.
Allow to sit in fridge overnight.  The rising will begin to take place there.
Allow to come to room temperature before putting in the oven.
Bake until golden brown.  Do not underbake!
The caramel glaze should be thin enough to pour -- kind of like pancake batter.
Frost promptly out of the oven.
Tips and notes about this recipe:

  • The water should be about 105 degrees - any hotter could kill the yeast.  
  • Eggs are best added to baked good recipes when they are at room temperature.
  • Add the full five cups of flour, and then more only if needed.  Do not use the dough hook to knead the dough.  Minimal kneading is necessary.  When I had students do this at school they didn't use the Kitchen Aides at all -- everything related to the dough was done by hand.
  • As mentioned in a caption, there is a lot of the filling!  Use only as much as you want.
  • The dough is soft, so the best way to cut the rolls is to shimmy a long piece of unflavored dental floss under the roll and cross the ends above it, which slices right through the roll resulting in clean cut.
  • When we did this at school I used evaporated milk for the icing because it was easy to keep on hand.  Half and half works great -- my guess is that milk would be fine too.
  • The icing ingredient quantities are imprecise because it depends upon your preference as to how thick you want it.
  • Even though there are a lot of steps, this is a great recipe, and can be done in a reasonable amount of time.  It's worth the effort!

Use the link below to access a printable copy of this recipe.  

http://www.scribd.com/doc/134559844/Overnight-Cinnamon-Rolls

As I've mentioned before, we are still learning what our options are for the blog and attaching files.  So far, this is the only way I have figured out to do it to allow any reader to be able to print.  If anyone has suggestions for me, I'd appreciate hearing from you!


Happy Baking!