Labels

Friday, March 22, 2013

Eight Tips on Thrifting

by Heather

Can thrift shopping be taught or is it an innate skill for which I didn't receive the gene? I posed the question to fellow blogger, Sheila, and asked her to take me on a guided day trip to her favorite places to hunt for frugal finds while teaching me the basics of thrifting.
Our first stop was the Goodwill Store in Tempe, AZ.
Tip #1: Don't leave home without printing out the coupon for 20% off your purchases.
Tip #2: Check out the daily deals. 
Anything with a pink price ticket was an additional 50% off today! One of my Advanced Early Education high school students, Cassie, told me that every other Saturday is 50% off everything in the store. Ahhh, the teacher learns from the students once again.
I was pleasantly surprised by how neatly the merchandise was presented. We weren't shopping for clothing but all items were organized by color and the overall look was more impressive than many  discount stores.
Mmm...I don't need a new table but if I did, I could see that this one had possibilities...
Tip #3: Always travel with a tape measure and a list of the items you need and their dimensions
Measure the item that is a possibility. Much easier than dragging it home only to find it's too big or too small.
Tip #4: Find the unusual places in your community for thrifting.
Second stop was the ReStore, which is a Habitat for Humanity enterprise. The ReStore sells new and gently used building materials, household items, furniture and fixtures from contractors, individuals and partner retail stores. The donated materials are sold at 20-70% off retail prices with the proceeds helping to support the mission of Habitat for Humanity. Everybody wins -- we get necessary items at greatly reduced prices which then helps volunteers build homes for the needy!
Lots of merchandise for sale from bathroom fixtures to lighting to...well, you name it, they seem to have it!

Stardust Building Supplies has recycling and reinvesting in the community at the core of its mission. It's a non-profit community service organization that operates warehouses that offer new and gently used building materials and supplies at 50-80% off retail prices. The profits then are invested back into the community by helping with home improvement projects for those in need. As they say, "Stardust provides an environmentally responsible way to keep usable building materials out of the landfill and putting them back into the hands of people who can use them."
This granite-topped cabinet, sink and faucet is just one example of the numerous items for sale.
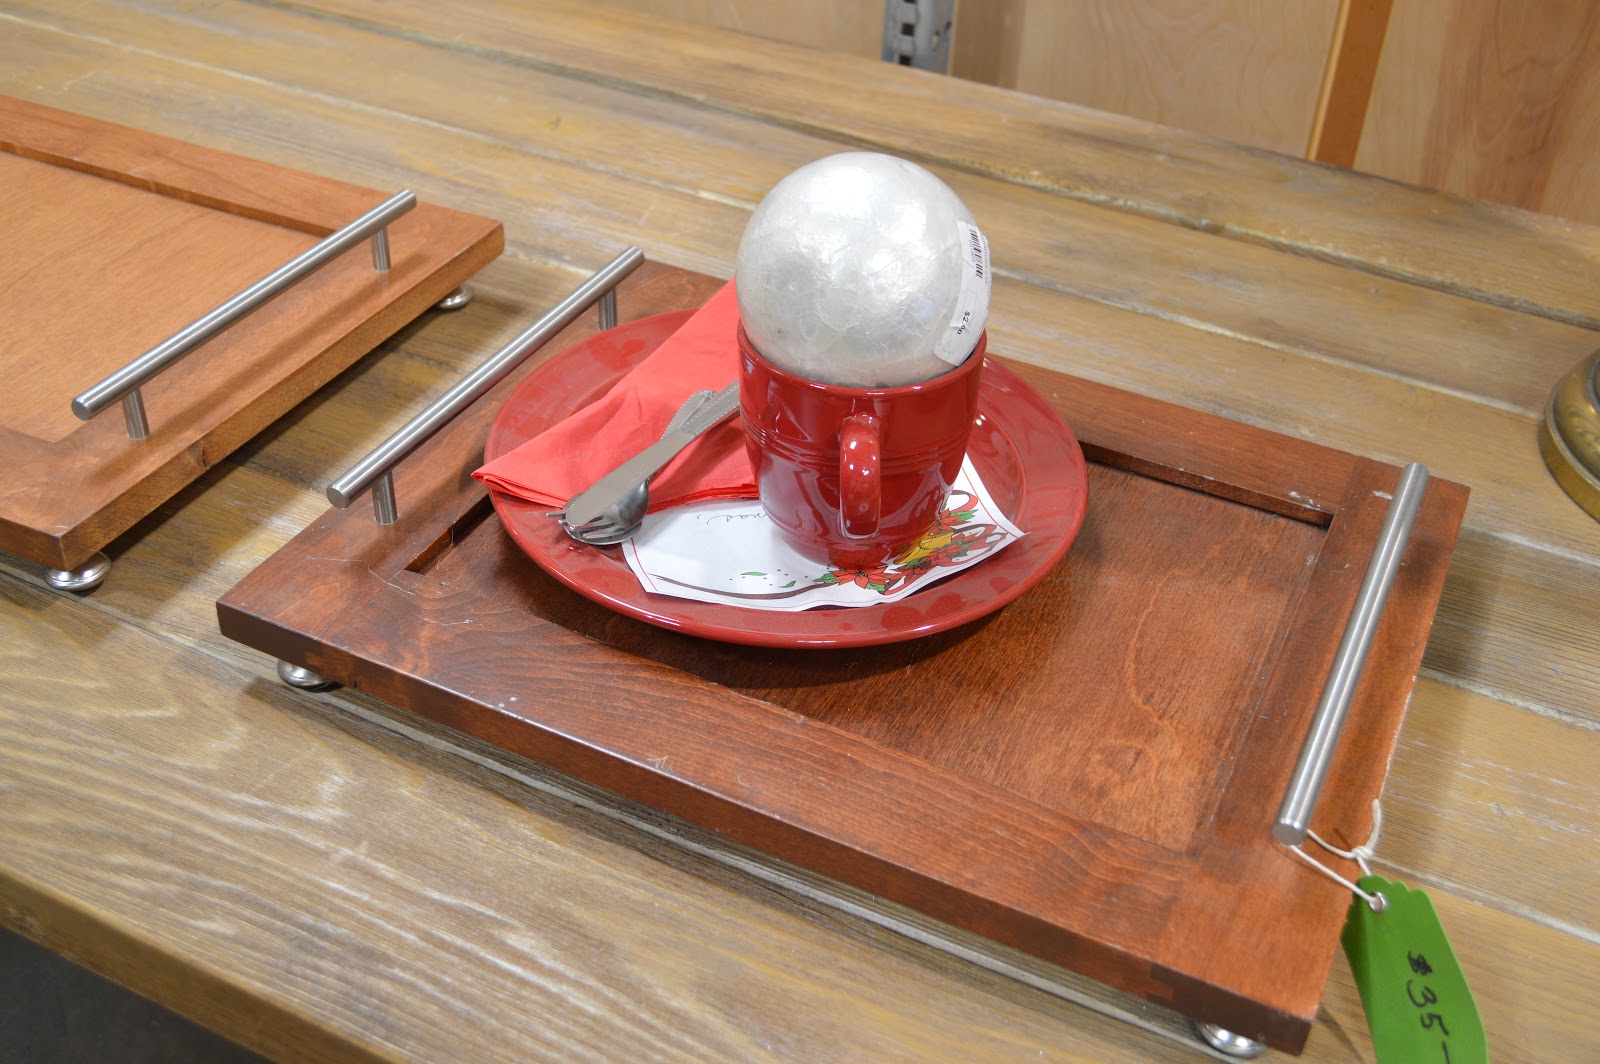
Tip #5: Think of how to repurpose your finds.
This type of display helps people like me who can't imagine what some of these items could be used for, other than the obvious. Here they have taken cupboard doors and repurposed them into trays. Very cool.
Here's another idea: take that door and make it into a desk... 
Or turn those shutters into a bookcase!
Tip #6: Shop these places on a fairly regular basis as the merchandise can change by the hour. 
While we were there, a builder dropped off several truckloads of brand new kitchen cabinets. What a steal those will be for someone!

Tip #7: Ask them if they'll hold the merchandise for an hour or two while you make up your mind.
I was on the hunt for two mirrors to hang on either side of the master bed. These two mirrors almost came home with me. Each one was only $30, but the color wasn't right and I would need to repaint them. Also, they were quite heavy and would have required some work to hang.
I put them on hold for a couple of hours but decided against them in the end.
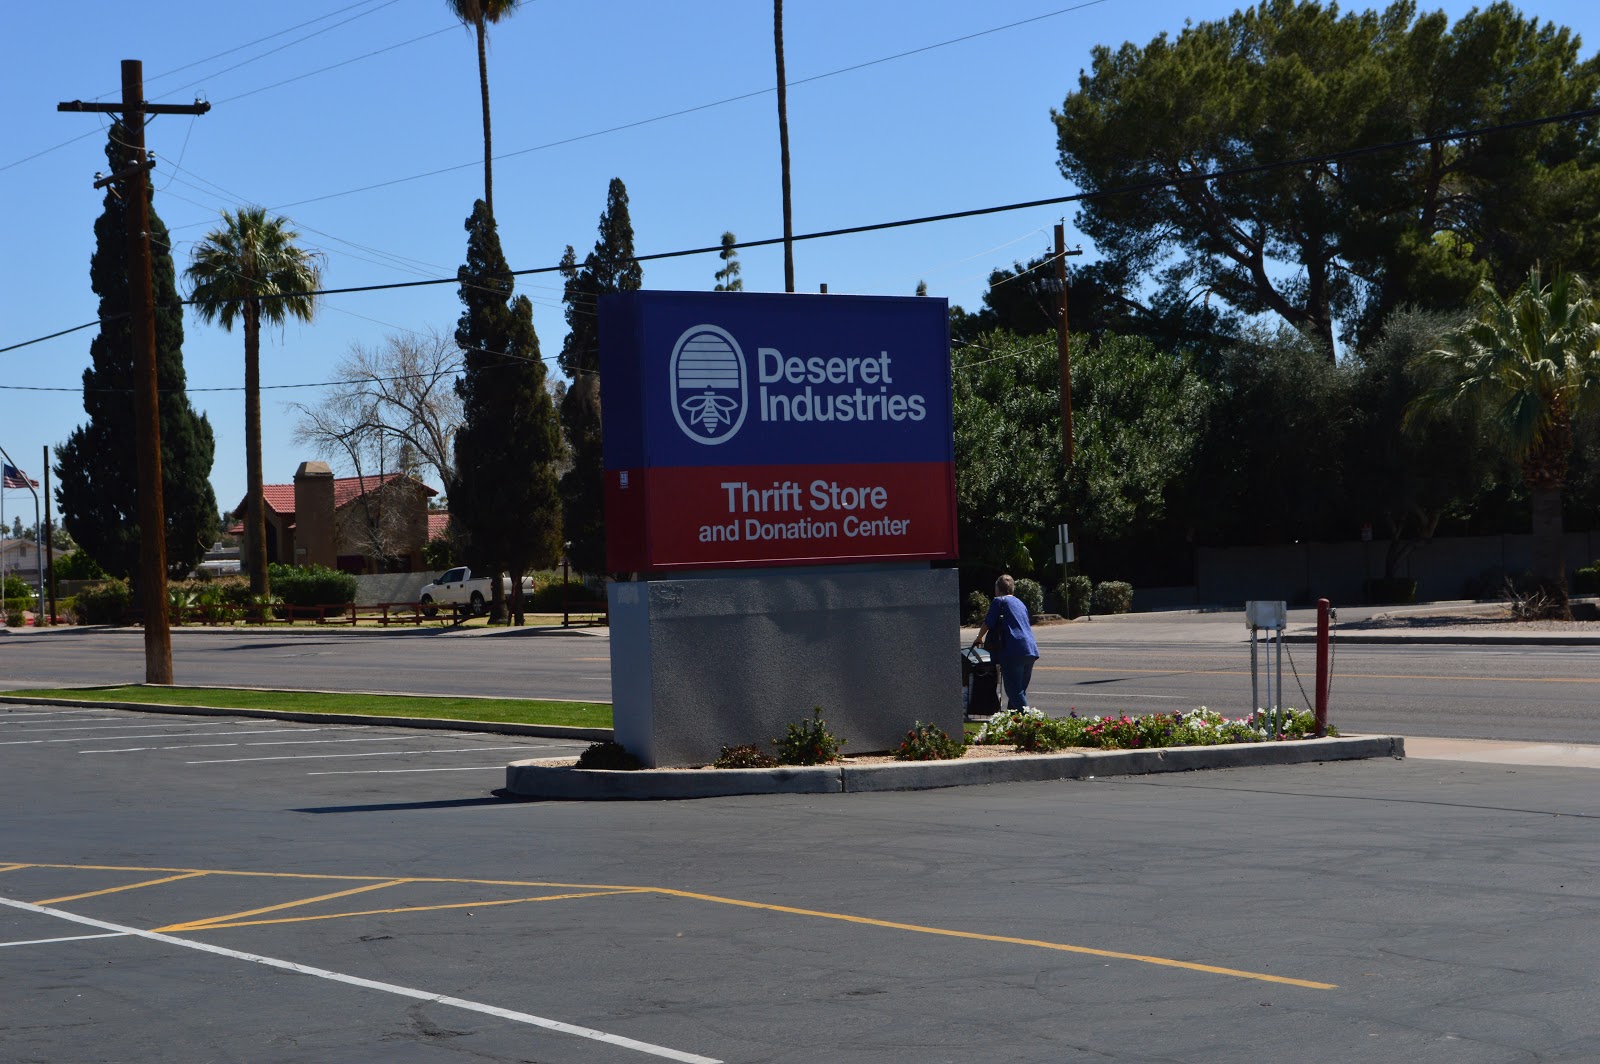
 The next stop was Deseret Industries, a Mormon-based thrift store that uses the sales revenues to pay for vocational training for those in need as well as provide humanitarian assistance worldwide.
Clothing, furniture, and household items are available at very reasonable prices.
Tip #8: Any kind of shopping is more fun with a break for food and drink.
 A much-needed stop to refresh with a little authentic Mexican food!
Check out the size of the door. Everything here is over-sized including the 16 oz margaritas.
Chimichanga - I'm sure we'll wear this off with all of our shopping!
Our last stop was the Goodwill Store in south Scottsdale. We found several small treasures: books and baskets for both of us. The $.99 baskets will be perfect for Easter baskets for the grandchildren.

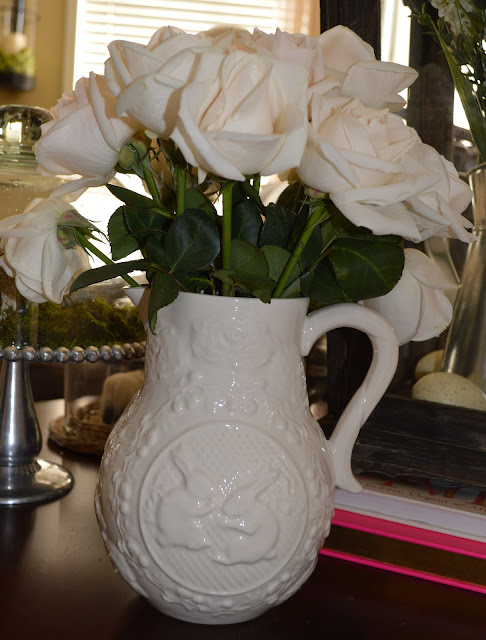
This bunny pitcher is a thrifty find from Home Goods!

I approached the day as a way to help myself save a few dollars, but ended the day seeing that it would also be a way to help my community. 
Not a bad way to spend some time now, is it?
Fun, food, furnishings, finds, frugality, and friendship -- thanks, Sheila!

Love, 
Heather


Thursday, March 21, 2013

DIY Headboards

by Sheila
Margo's Beautiful DIY Headboard


My daughter-in-law Margo is a clever crafter with a great eye for design. She also likes to stretch a dollar where she can (don't we all) and she is very good at making cool stuff on a budget. The last time she was in for a visit we were discussing some of our projects and she was telling me about the headboard she had created. She was gracious enough to share her process and even the photos she took along the way.  She used a shower curtain from Target for her fabric choice and covered a large frame available at your local art supply store (Michael's coupon, I'm sure).  She then used batting and stretched the fabric and batting over the edges, stapling it in place on the back. Voila'!


The Target shower curtain - great fabric choice!
 
Be sure to center your design, as she does here.
 
Stapling the edges on the back.
 
The finished product!
 

I also created a headboard for my guest room. I think I saw something similar on HGTV (I'm addicted).

Materials:
2 plug-in wall sconces
a piece of plywood cut it down to fit the area (and shape) behind your bed
fabric to cover face of headboard with 2" extra on all sides to cover edges
batting cut the same as fabric
2 x 4 "legs" if you want your headboard taller than the standard 4' height of plywood

Tools:
saw to cut plywood (or have hardware store cut to size)
scissors to cut fabric and batting
drill to drill holes to mount wall sconces
staple gun and staples to attach fabric and batting to plywood

Directions:

1. Cut plywood to size
2. Determine desired location of wall sconces. Drill holes large enough to push plugs through.
3. Lay fabric out flat on the floor, right side down. Lay batting on top of fabric.
4. Place plywood on fabric, centering it so 2" overhang all edges.
5. Wrap fabric and batting to back of plywood and staple it in place. Once you complete one side, do the opposite side, pulling fabric and batting taut to create a smooth surface on the front.
6. Determine location of drilled holes and carefully cut a large enough hole through fabric to push plug through.
7. Following mounting directions, screw wall sconce mounting plate to front of headboard, making sure you leave room to fit plug through.
8. Complete mounting wall sconces to headboard, following manufacturers directions.
9. If needed, screw 2 x 4 "legs" to bottom of headboard to raise it to desired height.

The headboard in my guest room with "built-in" lighting.

Wednesday, March 20, 2013

Freezer Meals

by Sheila

Ingredients


Supplies
 
Recipes
A few months ago, I made the bold statement that I wanted to start cooking at home more. My intent is to eat healthier, save money, and mostly for the convenience. I don't like the "I'm hungry and have no plan for dinner, so let's go out" desperation. Not that I don't like to dine out at restaurants. I do. But, it's the lack of options, simply because I didn't have it together that frustrates me. And the extra calories. And, okay the extra expense. So, my Mom and I have been talking about doing some make-ahead freezer meals. We finally pinned down a date and made a plan. We were happy with the results, and are planning to do this again soon. 

The items we made were chosen based on variety and good old standbys that we know we like. After doing a little research we came up with:
Twice Baked Potatoes (10 servings)
Marinara Sauce (we love Giada de Laurentiis' recipe) (1 gallon)
Beef Stroganoff (hadn't made this in ages; it froze really well, even with the sour cream, 12 servings)
Chicken Divan (12 servings)
Chicken Roll-ups (chicken breasts with prosciutto and provolone inside, 8 servings)

We doubled all of our original recipes. We made a grocery list and split it in half, each shopping for half the ingredients, and planned to split the cost in the end. We decided that next time, we will alternate cooking at each other's houses, and whoever's kitchen we are using will do all the grocery shopping for that time. This made more sense, as it isn't really necessary for both of us to shop (and that's the part I hate the most) each time. Also, you will know if you need to pick up general supplies, like flour for example when the cooking is at your house. Also, we purchased freezer baggies, permanent markers, and a few small disposable pans.

I arrived at my Mom's with my groceries at 9:30 am. We started out with a cup of coffee and then got to work. She had put the potatoes in the oven earlier, so they were baked and ready to go when I arrived. I worked on those, while she started on the marinara sauce. We worked along tweaking recipes as we went and making a real mess of her kitchen, but we had a great time. Then on to the chicken divan and beef stroganoff. We had not made the chicken roll-ups before (similar to chicken cordon bleu), and we saved this for last. After a quick lunch, we tackled the herculean effort of cleanning up. We finished everything and I was on my way by 2 pm. So in a little over four hours we produced quite a few dinners for each of us.

Quite a few meals for a half a day's work!

Our tips will probably seem obvious, but be sure to label each freezer baggie with the item (marinara and chili can look very similar in the freezer) and the date. this is easiest done before they are filled. We find it helpful to fold the top inch or so of the bag down when filling, so that the top section that you close stays clean. Also, the baggies are best for storage, because you can fit quite a bit more in your freezer than if you put say the beef stroganoff in a disposable pan or tupperware type container. Also, this brings up the last point - be sure to have room in your freezer. We wrapped the potatoes and chicken roll-ups individually in plastic wrap and then put them in larger freezer bags. My Mom froze everything at her house, and then delivered it to me later in the week. Nice!
And the mess in Janet's kitchen went from this...
  
... to this. Nice!

Also, we shared with my daughter as a surprise to her. This would be nice to do for anyone who is really busy, under the weather, or let's face it - just likes to eat. She was thrilled! We are looking forward to doing this again, and we plan to do it every month or so. If you have some suggestions for recipes that freeze well, we'd love to hear from you!

Tuesday, March 19, 2013

Feta Cheese, Tomato and Basil Ponchettes

by Ann
Ok, so are you asking, "What the heck is a ponchette"?  Even though I could have guessed from seeing photos of the end product and preparing this recipe, I looked in up on Google, and found that ponchette is a French term for a little bag.

This was one of the recipes I got from the cookbook, Tangy Tart Hot & Sweet as I searched for Indian recipes for my book club meal last week.  The fact that the title has a French word in it and the ingredients include Greek feta cheese clued me in to it not being an Indian dish.  But heck, it looked so good that I made it anyway!

Padma Lakshmi, the author of the cookbook warned that it was labor intensive, but that it was worth the effort.  I'd have to double check that fact with Ginny, one of my book club pals who agreed to come early to help me scramble to get ready for the gang; the "intensive labor" part of this recipe ended up being her responsibility.  They were delicious and attractive to serve (thanks to Ginny!).


Ponchettes of Feta, Tomato and Basil

Ingredients:
Half of a 1-pound package of filo dough
5 plum tomatoes
8 oz Greek feta cheese, crumbled
2 c loosely packed, finely chopped fresh basil
½ t crushed dried red pepper
salt (optional)
1 c clarified butter
Directions:
Remove filo from the refrigerator 30 minutes prior to starting.
Slice tomatoes lengthwise to scoop out the seeds  with a spoon.  Squeeze gently with paper toweling to eliminate excess liquid.  Get the tomatoes as dry as possible.
In a bowl combine tomatoes, feta, basil, crushed red pepper and a pinch of salt.
Prepare filo dough by laying out a clean dish cloth on a flat surface.  Stack the filo on the cloth, and cover with another dish cloth.  With hot water dampen and wring out a third dish cloth and lay on top of the top cloth.

Preheat the oven to 375°.
Cut the filo with kitchen shears to squares (or slight rectangles) between 7-8”, depending upon the size of the dough.  Remove three squares of the dough at a time, keeping the rest covered.

Take one sheet and brush it with the clarified butter.  Place a second sheet at a 45° angle and brush it with butter as well.  Repeat the process with the third sheet of dough.

Spoon about 2 T of tomato mixture in the middle of the filo.  Gather the corners and twist gently.  Fan out the ends and peel the petals to create a rose floret.  Brush the top of the ponchette with more clarified butter.

Place the ponchettes on a baking sheet in the preheated oven for 10-12 minutes until golden brown.  Serve warm or at room temperature.
Makes about 12 good-sized appetizers.

Here's the drill on preparation and assembly:

Remove all of the seeds and liquid centers of the tomatoes, leaving only the skin and pith that is attached to it.
Combine the diced tomatoes, crumbled feta, slivered basil and crushed red peppers.
Place a couple of tablespoons of the mixture in each prepared "pile" of three sheets of filo with butter brushed between each layer.
Twist the layers to create rosettes.  Don't stress if they aren't perfect!!
Bake for 12 minutes until golden brown and delicious!  Enjoy!

Sunday, March 17, 2013

Neutral Naturals and Gold

By Heather

What do you wear when the temps are going into the mid 90s and your husband says, "Let's get lunch and a glass of wine at Zinc Bistro at Kierland Commons." He escalates the offer by saying that I could browse the shops as we walk to the restaurant (he had me at lunch and  a glass of wine). To make the day even more delightful, we're being joined by an old family friend from Minneapolis, Dr. Streu, who spends the winters in the Valley of the Sun. Dick Streu was Tom's dad's best friend and the Streu family and the Glaeser family spent a lot of time together as the kids grew up. He's the most spry 83-year-old I've ever known, a great conversationalist, and very generous: he treated us to lunch!

 A little shopping at Z Gallerie before lunch. Kish linen pants and sweater from the Everything But Water store at Kierland (this store is more boutique-like than their other stores)
I like wearing natural fibers when it's summer (yeah, I know it's technically still spring but tell that to the Scottsdale weather gods) and when you're my age (over 60) and my shape (curvy with wobbly parts), it's best to cover up a cami with a loosely-woven sweater that allows air to flow but covers the arms. I know it looks a little shapeless (when you're short and curvy, you're supposed to wear closer-fitting clothes that show some shape) but sometimes I just don't want to follow the fashion rules; I'd rather be comfortable. With age comes freedom!
Coach purse; Vaneli cork wedges from Marmi 
Tiffany sunglasses; Michael Kors watch; pave link bracelet, small gold necklace from Nordstrom's; longer gold necklace from Macy's; Alexis Bittar bangles; macrame bracelet with metal discs from Everything But Water.

Tom, in his standard summer uniform of polo shirt and khaki shorts, sitting down for lunch with dear family friend, Dr. Richard Streu. How come Dick has more brown in his hair than Tom does?? But isn't my husband handsome with all of that white hair?

Local store, Oils and Olives, at Kierland Commons 
Bought the best Maytag blue cheese stuffed olives, a loaf of crusty country bread, carmelized red onion and fig tapenade, and garlic parmesan crema here for a tasty respite later in the day along with a bottle of wine.

 Across Scottsdale Road from Kierland Commons is another shopping mecca called Scottsdale Quarter. I always make sure to stop in at Pottery Barn and Restoration Hardware when I'm there. These pictures are from Pottery Barn. Loved their latest vignettes featuring some of their summer items.
 My favorite tablescape. 
Is is time to decorate for summer? I'm getting in the mood!

Have a wonderful week!
Love,
Heather