Labels

Friday, January 18, 2013

Decorating with Books

by Heather

I love books. I read them to learn, to get inspired, and sometimes to escape. It's been said that reading a good book feels like the picture below, and I think I agree.
With a large collection of books -- fiction (love detective mysteries the most), interior design and entertaining books, and a new growing genre of "how to blog" books -- I'm always looking for ways to house them attractively. 

We have an office that also functions as a library, but the books outgrew those shelves a long time ago so now only the favorite fiction novels are kept there. I keep the books that I use for blogging tips near my desk, but most of the interior design and entertaining books have to find places elsewhere around the house.

The "library" shelves in the office
The shelves closest to my desk below
Whenever it's time to change the decor in the house (usually seasonally), I'll sit down with a cup of tea and open up interior design books to get some inspiration.  Current favorites are Patina Style (Brooke and Steve Giannetti), Vintage by Nina (Nina Hartman), Black and White (Celerie Kemble), and Hers (Jacqueline deMontravel). Most of these books feature wonderful vignettes using books as design tools to create interest, color, and height.  I find that as soon as I clear a table of Christmas decor, I want to create something new using the books who need a home and any other found objects. Heaven forbid there are any unadorned surfaces in this house.
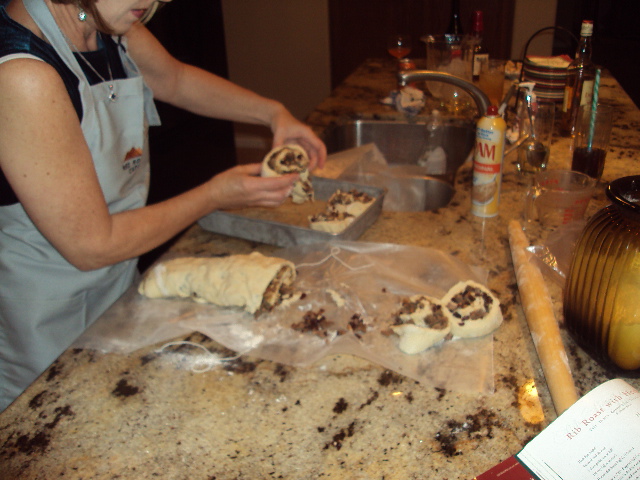
On the dining room table, I used small concrete books (found at On the Veranda in Phoenix, AZ) to help raise the small boxwood topiaries under the screen cloches.  The concrete books are wonderful to use outside because they can withstand any weather, but I'm using them inside while it's too chilly to be outdoors.  I know, it's Phoenix and not THAT cold, but we're spoiled when it comes to weather.
 
Check out the detail in these books! The pages look almost real.
The living room side table gets outfitted with stacks of design books used to add height and interest.

Drawing design inspiration from Patina Style:
Love the clean simple display of books of a similar color

I've never been able to tear apart a book to use in craft projects (I'd rather donate old books to the local school library or give them to a friend), but I have to admit I'm intrigued by how others are creating delightful decorative items out of books.

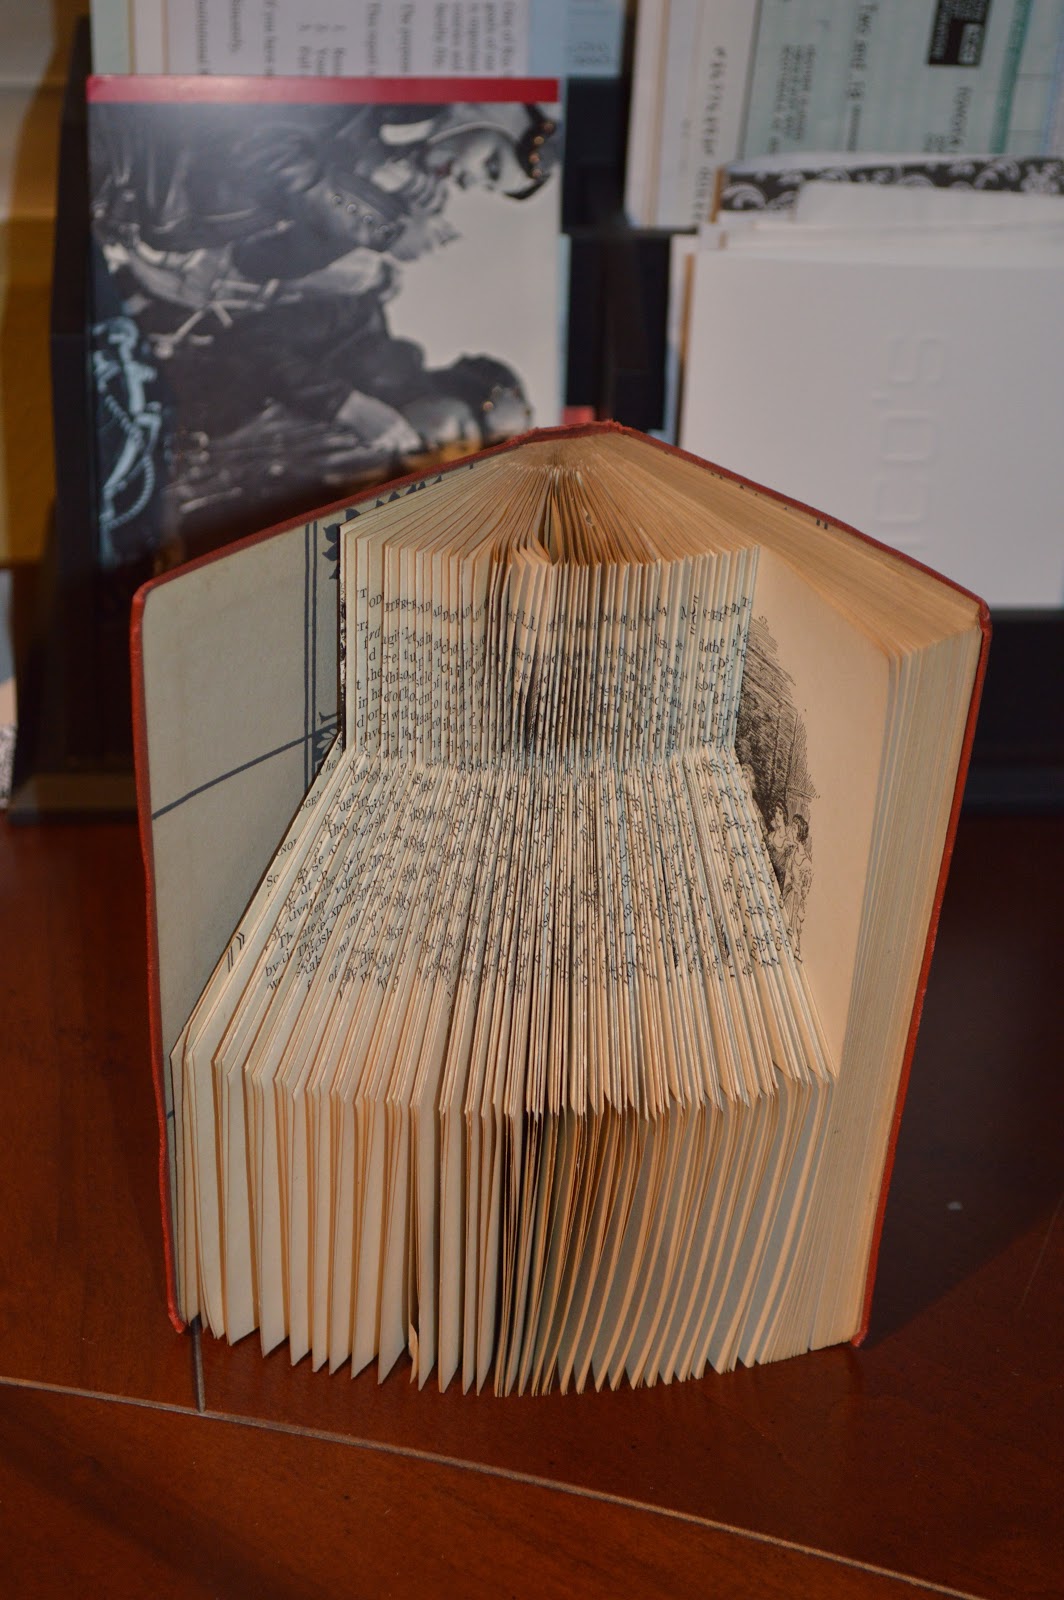
I found this lovely little red book in Boston several years ago and was captivated by the crisp, clean folds that made the book an objet d'art. 

From BHG
How cute are these little goblins floating up from the pages?
Source unknown
What a perfect present for your favorite teacher! Just make sure it's not a school textbook that you're using :)
Source unknown
Don't you love the simplicity of this heart made from the pages of a book?  If the text was about love, it would be perfect.
Source unknown
I'd love to make this page table runner for a Book Club dinner.

One little project I did take on was creating my own stacks of vintage books (they were technically vintage already but I helped them along by dyeing the pages with tea) tied together with twine. At Christmas I dusted the spines with gold glitter.  To use them now, I just turn them around so the spines aren't on view.

With all of the decorative ways to use books, it's good to remember that...
 sometimes it's just best to read them aloud to your favorite little people!


Love,
Heather


Thursday, January 17, 2013

House Punch List

By Sheila

James Taylor says the Secret to Life is Enjoying the Passing of Time.  My brother says the secret to enjoying your life is learning to like maintenance. I think they are both saying the same thing.

The first time I heard my brother say that, I didn't really get it, but in retrospect, I have come to agree with him. We spend a great deal of our time doing things like laundry, cooking, cleaning which, let's face it never ends. And taking care of ourselves (showering, eating, exercising, etc.).

In addition, there are all those little, or not-so-little items on the to-do list for your home. I first ran across the idea of a house "punch list" in one of Alexandra Stoddard's books. She is an interior designer and author whose books I have read and collected over the years. The idea of a punch list is an ongoing list of maintenance issues that need to be addressed. At first the idea of a random list of honey-do's seemed a little overwhelming. But since I am often the "honey" I realized I like the idea of a master list of things to take care of, helping me organize and even shop for ongoing projects on my list.

Here are few of the things on my current list:
Touch up white trim throughout house
Paint inside bedroom doors
Replace hall sconces (2 1/4 inches from center to side)
Hem closet curtain

When I am at my favorite home improvement stores or shopping online I can check what's on my list, what materials I might need, and I always keep all my measurements here as well. This saves me time and money. The Punch List has become a really helpful ongoing part of me enjoying the passing of time.

Here's to learning to love maintenance...... Or just have a glass of wine and start your list?!

Wednesday, January 16, 2013

The Story of a Friendship

By Sheila

Tamra Dalene Young

I met Tami over 20 years ago, when our families both moved in next door to each other in a new neighborhood together. Little did we know at the time, that the friendship we built then would become one of the great joys of our lives. We watched our kids grow up together, and could think of nothing more fun to do on a weekend than hang out in the 'hood with each other and our other close neighbors. We danced in the rain with our kids, we had progressive dinner parties, we learned to jump from their trampoline to the pool, and mostly we became fast friends. We had game nights, we helped each other with house and yard projects and we threw some great parties. Tami and I once went on Halloween as Siamese twins; we were dressed in one really large t-shirt and pants, with our inside legs sticking out the back. We were doing great until we had to get down the stairs and then we had some serious coordination issues, but we were a big hit! We laughed hard at the same things, and she always made me laugh!

For years we met outside at 5 am, riding our bikes for exercise, and then sitting out on the sidewalk in front of our houses drinking coffee in the dark before work. It was often one of the best parts of my day. From there, we started riding longer distances and entered some organized rides, 40 miles, then, 62, and even the MS 150. She always pushed me to try these challenges, and I was always glad. We also had many good times boating on the water, sometimes Canyon and Saguaro Lakes, and even using our sons' boats cruising the urban lakes on a sunset cruise with a bottle of wine.

One of many fun dinners together
Times change, and so do families, and when everyone else had left the neighborhood, we moved too. Tami eventually bought her condo pretty close to us in Tempe. We drifted away from bike riding, but our friendship grew stronger. By this time, we were both flight attendants, and shared an understanding and interest in each other's work. We loved comparing notes on what our companies were doing and sharing the crazy stories only another flight attendant could fully appreciate! We were exercise buddies still, working out at the track and the bleachers as often as our schedules allowed, and of course going for coffee afterwards.

We shared real estate adventures as well, even being crazy enough to do a flip house together! Tami was always there for me. I remember when I was really under a tight deadline to get our 4-plex move-in ready for new tenants. She was still feeling pretty awful from chemo, but she came up and scrubbed those floors on her hands and knees to help me out. We went on travel adventures together too; a trip to San Francisco, another one to Hawaii, girls camping trips and bike excursions. We were planning a New York trip and were going to take our Moms. We didn't get there.

We helped each other with the fun and the busy parts of marrying off our kids, and having grandkids and just watching and helping our kids become adults. We shared the trials and tribulations that Moms do when they care about each other and each other's families.

Tami was a woman who lived large. She loved her family, her friends, and going on adventures. She loved her Harley and her cats, and having a cozy place to come home to. She was determined not to let cancer define her; nor was she going to spend the time she had looking over her shoulder for the next setback. Even when she wasn't feeling great, she made the effort to get up and go, knowing all too well that none of us live forever and she didn't want to miss a thing. She trusted me to help her with some of the hard parts of her fight, and it was my honor to do so. She had her priorities straight and taught me a lot about what is important in this life. She was our Steel Magnolia. I am a better person for having known and loved her for all these years.

Rest in Peace Girlfriend.

Tami at my daughter's wedding

Tuesday, January 15, 2013

Sticky Buns and Cinnamon Rolls

by Ann

Is there anything better than a fresh, hot cinnamon roll with gooey frosting?  I think I may have found its match with a sweet and savory sticky bun recipe that I came across on the Food2 App written by "thirshchfled" and adapted slightly for this post.  I will share both recipes. I made the sticky buns on Christmas eve to have them ready for the following morning, and the cinnamon roll recipe was a favorite from back in my teaching days.  Anything that could be made one day and eaten the next always worked best for our tight school time schedule.  

Sweet, Sour and Savory Sticky Buns

Ingredients for maple sugar glaze:
½ c light brown sugar
1 c (2 sticks) butter
pinch of salt (depending upon salted vs. unsalted butter)
¼ c pure maple syrup
freshly ground pepper to taste
Ingredients for buns:
1 t kosher salt
1 pkg (approx. 2 t) fast-rising instant yeast
4-5 c all-purpose flour
1 T fresh sage, minced
3 T sugar
5 T butter, softened
2 c buttermilk, at room temperature
1 egg, room temperature

Ingredients for filling:

1 # sage sausage
1 c dried sour cherries, coarsely chopped
2/3 c chopped pecans
¼ c light brown sugar

Directions:
Heat oven to 375°.  Break sausage into 1-inch pieces on a sheet pan.  Bake 15 minutes, or until sausage is thoroughly cooked.  Remove from oven and let thoroughly cool on paper toweling.  Chop with a knife or in food processor until minced.  Set aside in the fridge.
 

Combine glaze ingredients (brown sugar, salt, syrup and butter) in the bowl of a mixer, using the paddle attachment to cream.  Spread evenly on the bottom of a 9 x 13” pan, and place it in the fridge. 

Clean and dry the mixing bowl to use it in the next step.
In a different bowl combine 3 1/2 cups of the flour, salt, chopped sage, and yeast. Set aside.

In the mixing bowl combine the 5 T of butter and 3 T sugar creaming with the paddle attachment.

Add the egg and buttermilk to incorporate into the creamed mixture. Wipe any of the mixture on the paddle into the bowl and put the dough hook onto the mixer.
Add dry ingredients using the dough hook and turn the mixer on low until the gluten begins to form adding the remaining flour a bit at a time until the the dough starts pulling from the side of the bowl.  The dough should be soft but not sticky.
Remove the dough and knead it on the counter for 5 minutes until it is smooth and elastic.  Place it in a greased mixing bowl and cover with plastic wrap to rise in a warm spot for an hour until almost double in size.
 
Once risen, punch the dough down and knead it a few times.  Roll into a rectangle of about 9 x 13; about ½ inch thick.
Remove sausage from fridge.  Spread it evenly, along with the chopped cherries, nuts and additional brown sugar on top of dough, leaving about an inch on one of the long edges. 

Roll the dough as tightly as feasible into a 13 inch jelly roll.  Pinch the last unfilled edge to the dough to avoid having it fall apart.

Remove the pan with the glaze from the fridge.  Using a string or sharp knife cut rolls into approximately 1”rounds.  Lay them in the pan (they should not be quite touching) and cover with plastic wrap to set in the refrigerator overnight.
 
A couple of hours before you want to eat them the next day remove them from the fridge and let warm to room temperature for at least an hour. 

In a 350° preheated oven bake risen, room temperature rolls for 35-40 minutes.  Remove from oven when rolls are nicely browned on top.  Using two oven mitts place a tray on top of the pan and flip to invert like an upside-down cake.  Scrape any excess glaze off the pans to the rolls.  Allow to cool for five minutes, and then enjoy!

See below for a simpler, less expensive, but equally delicious recipe that is made in a very similar fashion.  If you follow the steps you should have success -- my high school students did!  The step-by-step directions were written for them.

Overnight Cinnamon Rolls

Dough Mixture          
Filling
Caramel Glaze
                                   
1 1/2 c warm water    
1/2 c brown sugar
3 T evaporated milk
1/2 c sugar
1/2 c sugar
2 T brown sugar
2 T yeast
1/4 c cold butter
3/4 c powdered sugar
1/2 c veg. oil
2 T flour
1/4 t vanilla
2 eggs, well beaten
1 T cinnamon
1 1/2 t salt      
5 c flour (approx.)

Dough:

1.      Measure water.  Place in small glass bowl and microwave until warm, not hot to touch;  about one minute.

2.      Pour water into a large bowl.  Dissolve the yeast in the warm water by stirring.  Add sugar and oil.

3.      Let rest for 15 minutes.  While the yeast is resting, make the filling, and set aside until needed.

4.      After the 15 minutes, add the beaten eggs and salt to the yeast mixture. 

5.      Stir in 4 cups of the flour.  Using a wooden spoon, mix well.  Add additional flour until the mixture no longer appears “wet.”

6.      On a clean countertop dust with flour.  Transfer dough to counter, and knead just until the dough is no longer sticky to the touch.  Be sure not to add too much flour.  The dough should not be stiff. 

7.      Roll dough to a rectangle about 18” x 16”.

Filling:

1.      Measure all ingredients in a bowl. 

2.      Using the blade attachement of the food processor all filling ingredients pulsing until thoroughly mixed, and butter is cut into tiny sized pieces.  (Can be done with a pastry cutter)

3.      Spread mixture evenly over the rectangle of dough, except the last 1” of one long side.

4.      Starting at the long side with the sugar mixture, roll as tightly as possible. 

5.      Pinch the end of dough into the roll once you are finished rolling.

6.      Using a piece of dental floss, cut ends of roll off by scooting the floss under the rolls and bringing it toghether. Cut remaining dough into equal parts;  about 1 1/2” wide. 

7.      Spray the 9 x 13” pan with PAM spray.  Place 8 rolls in pan with cinnamon side up, leaving the middle spot empty to insure even, thorough cooking.  Recipes should make 10-12 total.

8.      Lightly spray top of rolls with PAM. 

9.      Very securely place plastic wrap over the top of the pan.  Place in the refrigerator overnight.

Next day:    
Preheat oven to 350°.

Allow rolls to sit out in a warm place for at least 15 minutes.

Bake for 20 - 25 minutes.  Prepare the glaze while the rolls are baking.

Caramel Glaze:

1.      Combine evaporated milk and brown sugar in a glass bowl. 

2.      Place in the microwave and cook for 30 seconds at a time until mixture begins to boil.  Be sure to stir after every 30 seconds. 

3.      Add powdered sugar and vanilla;  beat with small electric mixer for 2-3 minutes. 

4.      Frost rolls promptly, right out of the oven.
 
Enjoy!  This is a great treat to bring to potlucks or brunches because they are oh-so-tasty, and can be prepared a day in advance.

Monday, January 14, 2013

Frigid Fashion in Phoenix

by Heather

It's Phoenix and it's frigid.  While those of you on the East Coast are basking in sunshine and warmth, we've had four days of temps below freezing at night and just below 50 for highs. This is unusual.  It's rather nice when standing in the sunshine under the azure blue skies,  but if you go into the shade, it's downright cold. And when night falls, all I want to do is curl up by the fireplace in flannel pj's with a cup of cocoa. I grew up in Minneapolis so I know what really cold weather is, but when one has lived here for several decades, the blood thins (I don't think that's true, but I like saying it).  Actually, I look forward to these few cold days.  It gives me a chance to shake the cobwebs off the winter woolies and wear them.

Tiffany sunglasses; Michael Kors sweater cape; Chico's faux fur scarf and brown jeans; Ralph Lauren purse; Franco Sarto boots

Just had to throw this picture in so you could see some of that blue sky and mountain.  The red-orange berries you see behind me are on a thorny woody evergreen called Pyracantha.  When the berries are ripe and juicy, the birds will devour them, and come late spring, the branches will be covered with aromatic white flowers. The fragrant green shrubs are rosemary and very useful when a recipe calls for that herb. Neither of these plants seem to have been affected by our freezing temps, thank goodness.

  
The bangles are Ralph Lauren and Chico's; the tortoiseshell watch (below) and set of three rings (above) are Michael Kors.

Standing in the sunshine is warm, so the fur scarf and boots had to go. The boots are replaced by leopard print peep-toe shoes that were purchased about seven years ago. At the time I thought I paid too much for them but if I figure out the cost per wearing, they were a really great deal.  Can't read the brand on the bottom -- only that they were made in Italy -- and they're extremely comfortable. Someday I'll need to replace them so I hope someone at Nordstrom's will be able to tell me who made them.


Stay warm, everyone!

Love,
H